
Consumer Electronics From Unbox to Setup: A First-Timer's Walkthrough
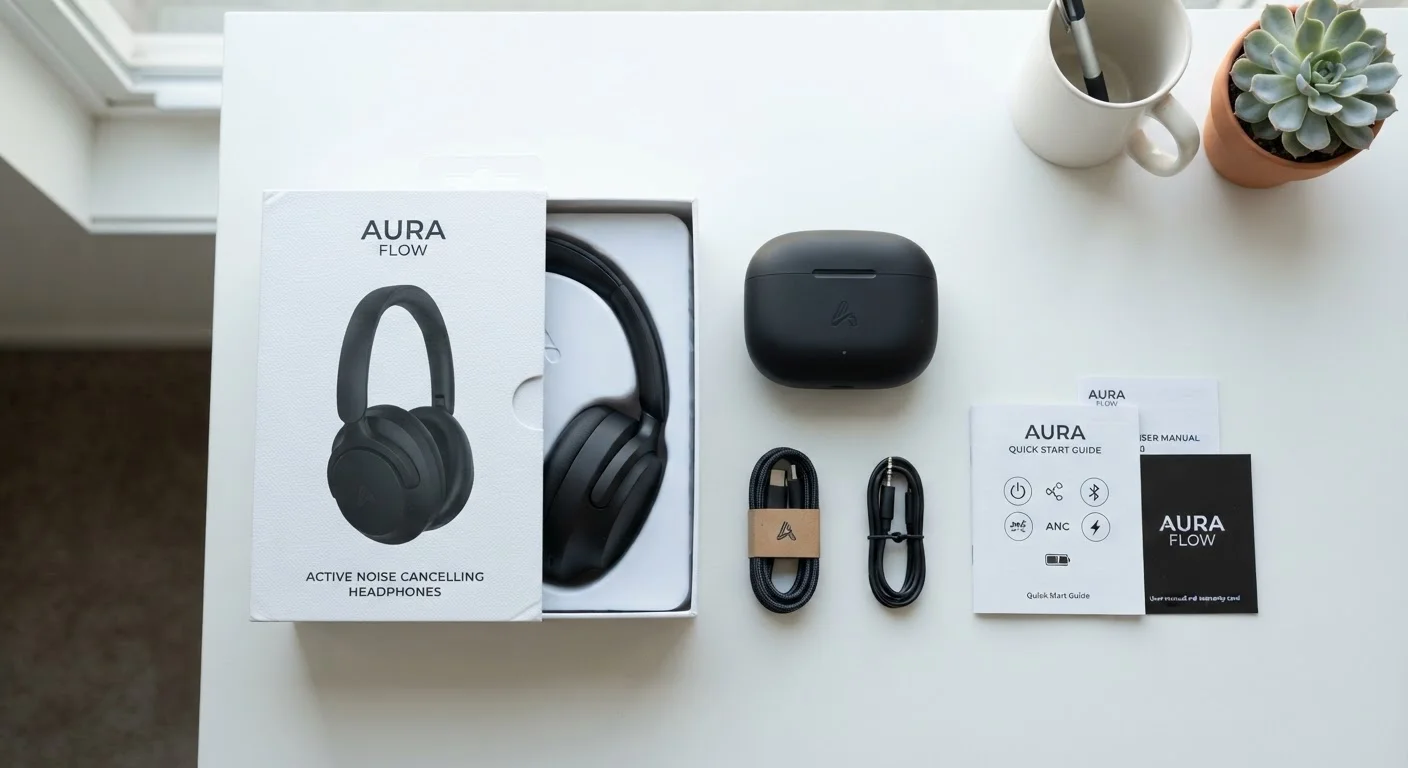
Photo credit: GadgetLite.net | All Things Tech
In this article
New to setting up your own devices? This walkthrough covers everything from powering on to connecting accounts, written for complete beginners.
Key Takeaways
- Inspect box contents before powering on — missing accessories are easier to resolve before setup begins.
- Most devices walk you through initial setup with on-screen prompts; you rarely need to read the manual.
- Installing software updates immediately after setup closes security gaps that existed since the device was manufactured.
- Creating a dedicated account with a strong password protects your data from the very first session.
- Adjusting privacy permissions early prevents apps from quietly collecting more data than you intend to share.
What's Actually in the Box
Before you plug anything in, take five minutes to inventory what came with your device. Manufacturers typically include the device itself, a charging cable, a power adapter (sometimes sold separately — check the box labeling), a quick-start guide, and any regulatory paperwork. Some devices add accessories like earbuds, a stylus, or a protective case.
Lay everything out on a flat surface and cross-reference it against the included accessory list, which is usually printed inside the box lid. If something is missing, contact the retailer before setup — once you've activated the device, some return windows begin counting down. For a fuller picture of what different device categories typically include, see our guide to navigating modern consumer electronics.
Setup wizard
An on-screen guided sequence that walks you through initial device configuration step by step, covering language, network, and account settings.
Firmware
The built-in software that controls your device's hardware. Keeping it updated ensures your device runs securely and correctly.
Two-factor authentication
A security feature that requires a second verification step — like a code sent to your phone — in addition to your password when logging in.
Cloud storage
A service that saves your files and data on remote servers rather than only on your device, making them accessible from multiple devices.
Permission prompt
A pop-up that asks whether an app or system feature can access something on your device, such as your location, camera, or contacts.
Powering On for the First Time
With the device charged to at least 20%, press and hold the power button until the screen lights up. Most devices display a logo, then launch a setup wizard — an on-screen sequence that guides you through language selection, region settings, and basic preferences. Follow the prompts step by step; skipping screens is rarely possible and not advisable.
If the device asks whether you're setting up as new or restoring from a backup, first-time owners should choose Set up as new unless they're switching from an older model of the same device family. Restoring a backup from a different platform can cause compatibility issues. Smartphone users switching devices will find our first-week smartphone setup guide especially useful at this stage.
Keep Your Login Credentials Somewhere Safe
During setup you'll create or enter account credentials that you'll need again — for recovery, new devices, or support calls. Write them down in a secure physical location or use a dedicated password manager app. Avoid storing passwords in plain text files or notes on the device itself.
Connecting to Wi-Fi and Accounts
The setup wizard will prompt you to join a Wi-Fi network early in the process. Have your network name (SSID) and password ready — you'll find these on your router's label or in your internet provider's documentation. Once connected, the device will verify the connection and may begin downloading updates automatically.
Next, you'll be asked to sign in to or create a platform account — an Apple ID, Google account, or manufacturer-specific login depending on your device. This account ties your device to cloud services, the app store, and device recovery options. Use a unique, strong password and enable two-factor authentication when offered. If this is your first time using cloud storage linked to that account, our beginner's guide to cloud storage explains how that system works and what data it holds.
Privacy, Updates, and First-Day Settings
After account setup, you'll encounter a series of permission prompts — location access, analytics sharing, advertising preferences, and more. Read each one before tapping Allow or Deny. These permissions can always be changed later in your device's Settings menu, so there's no pressure to accept everything upfront. Granting only necessary permissions limits how much data third-party apps can collect.
Once through setup, navigate to Settings and check for software updates. Devices often ship with firmware that's weeks or months old; an update may address security vulnerabilities or improve performance right out of the box. Install updates before downloading any apps. For a structured checklist covering these early steps — including firmware, privacy settings, and account security — see the pre-setup checklist for new gadgets.
Don't Connect to Public Wi-Fi During Setup
Setting up a device on an open public network — a café, airport, or hotel — exposes your account login to potential interception. Always use a trusted private network for initial setup. If you must set up away from home, use your phone's mobile hotspot as a safer alternative.
Common Setup Mistakes to Avoid
Even straightforward setups go sideways when a few predictable missteps happen. Here are the ones worth knowing before you start:
- Skipping the update step: Leaving outdated firmware in place means running with known security gaps.
- Reusing passwords: Using the same password across accounts puts all of them at risk if one is ever compromised.
- Ignoring storage setup: Many devices prompt you to choose local versus cloud storage early on. Making this decision carelessly can fill up local storage quickly. Tablet owners in particular run into this — the common surprises first-time tablet owners face covers this in detail.
- Rushing accessibility settings: Display brightness, text size, and sound settings are easy to overlook but meaningfully affect daily comfort.
For home devices specifically — smart speakers, displays, or lighting — the setup process often involves a companion app in addition to the device itself. If you're heading into smart home territory, smart lighting from scratch is a good next read. And for exploring what your smartphone or tablet is truly capable of beyond setup, that hub is a strong starting point.
Setup Steps Vary by Device and Platform
The sequence described in this guide reflects common patterns across major consumer device categories, but individual steps may differ by manufacturer, operating system version, or device type. Always refer to the device's own on-screen prompts as the primary authority for your specific model.
Frequently Asked Questions

Author
Electronics Editorial Team
Electronics Editorial Team is the collective byline for our editorial team and contributor network. Articles published under this byline or an editorial pen name are researched, written, and reviewed according to our editorial standards for clarity, consistency, and independence before publication.
View all articles →