
The Mobile Camera Settings Most People Never Touch — and Why They Should
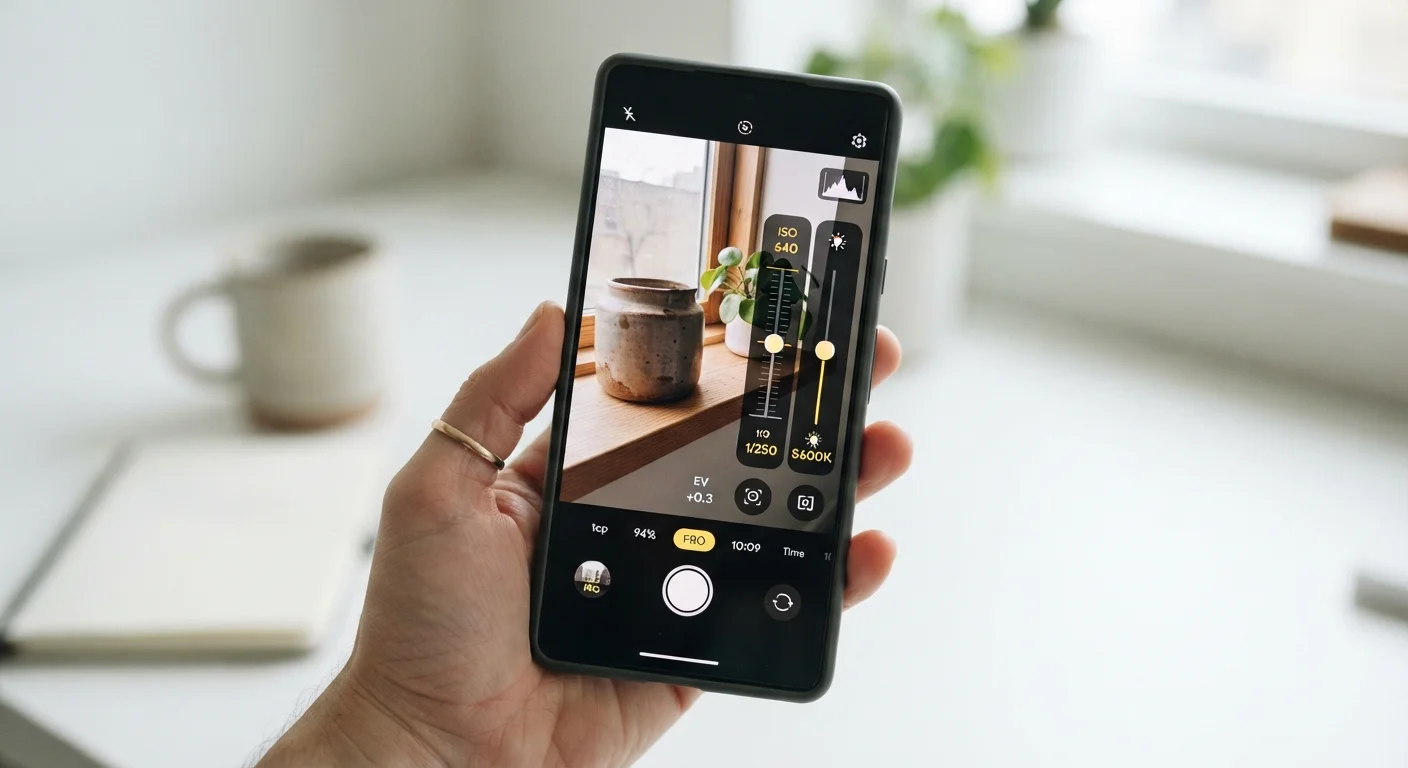
Photo credit: GadgetLite.net | All Things Tech
In this article
Your phone camera has more control than Auto mode shows. Discover the settings that genuinely improve everyday photos without a learning curve.
Key Takeaways
- Grid lines, RAW capture, and manual white balance are widely available but rarely used by most phone photographers.
- Turning off AI scene optimization gives you more predictable, true-to-life results in many situations.
- HDR mode, when set to manual rather than auto, prevents the washed-out look in high-contrast scenes.
- Adjusting exposure compensation before you tap to focus locks a more accurate brightness level.
- These settings appear across most modern Android and iOS camera apps with only minor menu differences.
Why Auto Mode Leaves Results on the Table
Auto mode is engineered for the average scene, not your specific scene. The camera makes a dozen decisions in a fraction of a second — exposure, color temperature, contrast, noise reduction — and in ordinary conditions it does a respectable job. But ordinary conditions aren't the ones where photos matter most: a candlelit dinner, a fast-moving subject, a dramatic sunset, a portrait under mixed indoor lighting.
The good news is that accessing more control doesn't require shooting like a professional or learning a manual mode from scratch. Several high-impact settings sit inside the standard camera app on most phones, require a one-time toggle, and operate invisibly from that point on. If you prefer zero settings changes at all, technique-based habits can still meaningfully improve your results — but settings changes tend to be more durable.
What you will need
The Settings Worth Changing — and How to Change Them
The steps below apply to most mainstream smartphones. Exact menu names vary between manufacturers, but the underlying options are broadly consistent across current iOS and Android devices. Work through them in order — earlier steps are simpler and build familiarity for the later ones.
Default Camera App
Access the built-in settings menus described in this guide — third-party apps vary in layout.
Pro or Manual Mode
Unlocks individual control over ISO, shutter speed, and white balance on supported devices.
Files or Photos App
Needed to view and compare RAW vs. JPEG files after shooting in RAW format.
Enable the composition grid
Open your camera app's settings (usually a gear or settings icon) and look for an option labeled Grid, Grid Lines, or Shooting Guide. Turn it on. A 3×3 grid will overlay the viewfinder, helping you align horizons and place subjects off-center using the rule of thirds — a basic composition principle that makes images feel more intentional.
Set HDR to manual, not automatic
Many phones default to Auto HDR, which blends multiple exposures together. This can soften motion and create an over-processed look in everyday shots. In your camera settings, switch HDR from Auto to On (for bright outdoor or high-contrast scenes) or Off (for portraits and moving subjects). Taking deliberate control here gives you cleaner, more consistent results.
Disable or moderate AI scene enhancement
Look for settings labeled Scene Optimizer, Smart HDR, Intelligent Camera, or similar. These AI tools automatically boost saturation, sharpness, and contrast based on what the camera thinks you're shooting. They can be useful but often over-process food, skies, and skin tones. Try switching this off and compare shots — many people prefer the more natural result.
Lock exposure before tapping to focus
Rather than just tapping to focus, tap and hold on your subject until you see an AE/AF Lock indicator (iOS) or a lock icon (Android). This locks both focus and exposure so the camera won't readjust as you reframe. On most phones, you can then drag a sun or brightness slider that appears to fine-tune exposure without unlocking the focus point.
Adjust white balance manually in Pro mode
Open Pro or Manual mode if your camera offers it. Find the WB (white balance) setting. Auto white balance often adds an orange cast indoors or a blue tint in shade. Setting a fixed white balance — such as Tungsten for indoor lighting or Cloudy for overcast days — produces more accurate, consistent colors across a burst of photos.
Enable RAW capture for important shots
In your camera settings or Pro mode, look for a RAW or RAW+JPEG option. RAW files store far more image data than compressed JPEGs, giving you far greater flexibility when adjusting brightness, color, or shadow detail in a photo editor. Note that RAW files are significantly larger — save this for moments that matter rather than everyday snaps.
Start With One Setting at a Time
Changing everything at once makes it hard to know what's actually improving your photos. Spend a day or two with just the grid enabled, then add one more setting. Building habits gradually leads to more consistent results than trying to master everything simultaneously.
Some Settings Reset After Each Session
Certain phones — particularly iPhones — reset settings like HDR or exposure compensation every time you close the camera app. Check your camera's settings menu for a 'Preserve Settings' or 'Reset Controls' option and toggle it on so your preferences stick between uses.
RAW Files Need Storage and Editing Apps
Enabling RAW capture can quickly consume significant storage space — a single RAW file can be 25–50 MB depending on your phone. Before turning it on routinely, confirm you have sufficient storage available and a compatible editing app installed. RAW is powerful, but it's a workflow commitment, not a free upgrade.
Beyond these camera-specific settings, it's worth noting that your camera app may have broader permissions that affect privacy as well as photo quality. For a grounded explanation of what those permissions actually mean, see what app permissions actually do.
Making the Changes Stick
Once you've explored these settings, the practical goal is to make them part of how you naturally reach for your camera — not a checklist you run through every time. The grid will become invisible background structure. Exposure lock will become instinct before any shot with tricky lighting. Manual white balance in Pro mode will feel routine when you're shooting a longer event indoors.
If you find yourself using your phone camera more deliberately, you may also want to revisit how your camera app interacts with the rest of your device. Reviewing your privacy settings broadly can surface a few related controls worth knowing about — particularly around photo library access and location tagging embedded in your image files.
The most important shift is conceptual: your phone camera is a capable tool with real manual depth. Auto mode is a starting point, not a ceiling.

Author
Gadgets Editorial Team
Gadgets Editorial Team is the collective byline for our editorial team and contributor network. Articles published under this byline or an editorial pen name are researched, written, and reviewed according to our editorial standards for clarity, consistency, and independence before publication.
View all articles →